
The best do-it-yourself (DIY) home improvement projects are those that add value to your home, improve its functionality, or simply make it more enjoyable to live in. Here are some popular DIY projects that cater to a range of skill levels:
Painting walls and ceilings
A fresh coat of paint can dramatically change the look and feel of a room. Choose the right colors and finishes to create the atmosphere you desire.
Here are some tips to help you achieve a professional-looking finish:
Prepare the surface: Before you begin painting, make sure the surface is clean, dry, and free of any dirt, dust, or debris. Fill any holes or cracks with spackling compound and sand the surface smooth.
Protect the surrounding area: Cover the floors, furniture, and any fixtures with drop cloths or plastic sheeting to prevent paint splatters.
Use the right tools: Choose high-quality paint brushes, rollers, and extension poles that are appropriate for the size of the area you are painting. A paint sprayer can also be a good option for larger areas.
Prime the surface: If you are painting a surface that has not been painted before or has been repaired, use a primer to help the paint adhere and ensure a smooth finish.
Apply paint in thin layers: Apply the paint in thin, even layers, starting from the top and working your way down. Use a roller to cover larger areas and a brush for corners and edges.
Allow each layer to dry: Allow each layer of paint to dry completely before applying the next layer. This will help prevent drips and ensure a smooth finish.
Clean up: Clean your brushes and rollers thoroughly with soap and water after each use. Dispose of any paint or materials in accordance with local regulations.
Installing a programmable thermostat
Upgrading to a programmable or smart thermostat can save energy and money while making your home more comfortable.
Here are the steps to install a programmable thermostat:
Turn off power to your heating/cooling system: Before you begin, turn off the power to your heating/cooling system at the circuit breaker or fuse box.
Remove the old thermostat: Remove the cover of your old thermostat and unscrew it from the wall. Take note of which wires are connected to which terminals. If you’re unsure, take a photo or label the wires with tape.
Mount the new thermostat: Follow the manufacturer’s instructions to mount the new thermostat on the wall. Use a level to make sure it’s straight.
Connect the wires: Connect the wires to the corresponding terminals on the new thermostat. Again, if you’re unsure, refer to the manufacturer’s instructions or consult a professional.
Install batteries: If your new thermostat requires batteries, install them according to the manufacturer’s instructions.
Program the thermostat: Follow the manufacturer’s instructions to program your new thermostat based on your schedule and preferences.
Turn on power to the heating/cooling system: Turn on the power to your heating/cooling system at the circuit breaker or fuse box.
Test the thermostat: Test your new thermostat to make sure it’s working properly by setting the temperature to a comfortable level and making sure your heating/cooling system turns on and off as expected.
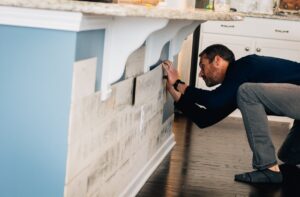
Replacing or upgrading light fixtures
Swap out dated fixtures for newer, more energy-efficient models, or install dimmer switches to create versatile lighting options.
Here are some steps to consider when replacing or upgrading light fixtures:
Determine the type of fixture you need: Before you start shopping for new light fixtures, it’s important to determine the type of fixture you need. Consider factors such as the size of the room, the height of the ceiling, and the type of lighting you want to achieve. Common types of light fixtures include chandeliers, ceiling fans with lights, pendant lights, flush-mount fixtures, and recessed lighting.
Choose the right bulbs: When selecting new light fixtures, it’s important to choose the right type of bulb. Consider factors such as the color temperature of the bulb, the brightness level, and the energy efficiency. LED bulbs are a great choice for most applications as they are energy-efficient, long-lasting, and offer a variety of color temperatures.
Turn off the power: Before you start working on your light fixtures, be sure to turn off the power to the room. This will help to prevent any accidents or injuries.
Remove the old fixture: To remove the old fixture, you will need to disconnect the wiring and remove any screws or mounting hardware. Be sure to carefully follow the instructions provided by the manufacturer.
Install the new fixture: Once you have removed the old fixture, you can begin installing the new one. Follow the manufacturer’s instructions carefully, and be sure to connect the wiring correctly. If you’re not comfortable with electrical work, it’s always best to hire a licensed electrician to do the job.
Test the new fixture: Once you have installed the new fixture, turn the power back on and test the light to ensure it is working properly.
Installing new flooring
Replace worn-out carpet or linoleum with new flooring, such as laminate, hardwood, or tile. This can add value and appeal to your home.
Here are some general steps to follow:
Choose your flooring material: There are many different flooring options available, including hardwood, laminate, vinyl, tile, and carpet. Consider factors like durability, maintenance, style, and budget when choosing your material.
Measure your space: Before purchasing your flooring, you’ll need to measure the area you plan to cover to determine how much material you need.
Prepare the subfloor: The subfloor is the surface the flooring will be installed on top of. Make sure it’s clean, level, and free of any debris or damage. If needed, you may need to repair or replace the subfloor.
Acclimate the flooring: Depending on the material you choose, it may need to acclimate to the room’s temperature and humidity for a certain amount of time before installation.
Install the underlayment: If your flooring requires an underlayment, follow the manufacturer’s instructions to install it properly.
Install the flooring: Start at one end of the room and work your way towards the other. Follow the manufacturer’s instructions for the specific type of flooring you’re installing.
Finish the edges: If needed, add transition strips or baseboards to cover the edges where the flooring meets the walls or other flooring.
Clean up: Sweep or vacuum up any debris and dispose of it properly.
Updating hardware and fixtures
Replace outdated cabinet knobs, drawer pulls, and faucets with more modern designs to give your space a fresh look.
Here are some steps to follow:
Identify what needs to be updated: Take a look at the hardware and fixtures in your space and determine which ones need to be updated. This could include things like door handles, cabinet knobs, faucets, light fixtures, and more.
Choose a style: Once you’ve identified what needs to be updated, decide on a style that you want to achieve. Look for inspiration online or in home design magazines and choose a style that suits your taste and the overall aesthetic of your space.
Measure and research: Before making any purchases, make sure you measure the spaces where you’ll be installing new hardware and fixtures to ensure a proper fit. Additionally, research different brands and products to ensure you’re choosing quality items that will last.
Purchase and install: Once you’ve chosen your new hardware and fixtures, purchase them and begin the installation process. Make sure you have all the necessary tools and hardware to complete the job, and follow the manufacturer’s instructions for installation.
Enjoy your updated space: Once your new hardware and fixtures are installed, take some time to enjoy your updated space. You’ll be surprised at how much of a difference these small updates can make in the overall look and feel of your home or office.
Adding storage and organization
Install shelving, hooks, and storage solutions to maximize space in your closets, garage, or other areas.
If you are looking to add storage and organization to your living space or work area, there are a few things you can do to get started:
Assess your space: Take a good look at your living space or work area and determine what areas are cluttered or disorganized. This will help you determine what types of storage solutions you need.
Decide on a storage system: A tip I got from a buy my house fast Jacksonville business owner is there are many storage systems available, including shelves, cabinets, bins, baskets, and more. Choose a system that will work best for the items you need to store and that will fit within your space.
Use vertical space: Utilize your walls and ceiling space by installing shelves or hanging storage systems. This will free up valuable floor space and help keep your items organized and easily accessible.
Label and categorize: Once you have your storage system in place, label and categorize your items to make it easy to find what you need. Use clear bins and labels to help you quickly identify what’s inside.
Regularly purge: Make it a habit to regularly go through your items and get rid of anything you no longer need or use. This will help keep your space clutter-free and make it easier to stay organized.
Invest in multifunctional furniture: Consider furniture that doubles as storage, such as an ottoman with a hidden storage compartment or a bed with built-in drawers.
Landscaping
Improve your home’s curb appeal by planting flowers, trimming hedges, or adding a stone walkway.
Plan your landscaping: Before you start your landscaping project, create a plan that outlines your goals, budget, and timeline. Consider factors such as the climate in your area, the amount of sunlight and shade, and the type of soil you have.
Choose the right plants: When selecting plants for your landscaping, choose species that are native to your area and suited to the soil, climate, and sunlight conditions. This will help ensure that your plants thrive and require less maintenance.
Use mulch: Mulch can help conserve moisture in the soil, prevent weed growth, and add nutrients to the soil as it decomposes. Choose a mulch that complements your landscaping design and the plants you’ve selected.
Add focal points: Focal points such as water features, sculptures, or garden structures can add visual interest to your landscaping. Choose a focal point that complements the overall style of your landscaping.
Install hardscaping features: Hardscaping features such as patios, paths, and retaining walls can add functionality and visual interest to your landscaping. Choose materials that complement your landscaping design and the style of your home.
Incorporate lighting: Lighting can highlight your landscaping features and add ambiance to your outdoor spaces. Consider installing lighting fixtures that are energy-efficient and complement the overall style of your landscaping.
Maintain your landscaping: Regular maintenance is essential for keeping your landscaping looking its best. This includes watering, fertilizing, pruning, and weed control. Regular maintenance can also help prevent problems such as pest infestations and disease.
Building a deck or patio
Create an outdoor living space to relax and entertain by building a deck or patio.
Here are some general steps to consider when building a deck or patio:
Determine the location: Consider factors such as sunlight, wind, privacy, and views when selecting a location for your deck or patio.
Choose the material: Decks are typically made of wood or composite materials, while patios are often made of concrete, pavers, or natural stone. Consider the durability, maintenance requirements, and cost of each material.
Design the layout: Determine the size and shape of your deck or patio, and consider features such as built-in seating, fire pits, or outdoor kitchens.
Obtain any necessary permits: Check with your local government to see if you need permits for your deck or patio project.
Prepare the site: Clear the area and level the ground before beginning construction.
Build the foundation: Decks typically require concrete footings or piers, while patios can be built on a gravel base.
Install the framing: This includes the posts, beams, and joists for a deck, or the edging for a patio.
Install the surface material: Lay the decking boards or patio stones according to the design.
Add finishing touches: Install any railings, stairs, or other features to complete the project.
Insulating your home
Add insulation to your attic, walls, or crawl spaces to improve energy efficiency and reduce utility bills.
Here are some tips for insulating your home:
Check for air leaks: Before insulating your home, check for air leaks around doors, windows, and other openings. Use weather stripping, caulking, or foam sealant to seal any leaks you find.
Choose the right insulation: There are several types of insulation available, including fiberglass, cellulose, and spray foam. Consider the R-value, which measures the insulation’s resistance to heat flow, and choose the type that best suits your needs.
Insulate your attic: The attic is often a major source of heat loss in homes. Insulate the attic floor to prevent heat from escaping through the roof. You can use batts, blown-in insulation, or spray foam insulation.
Insulate exterior walls: If you’re building a new home or doing a major renovation, consider insulating the exterior walls. This can be done by adding insulation board to the exterior of the wall or by filling the wall cavity with insulation.
Insulate floors: Insulating the floors can help prevent heat loss through the ground. If you have a crawl space, consider insulating the walls and floor of the space.
Consider professional installation: If you’re not comfortable with DIY insulation, consider hiring a professional to install insulation in your home. They can help you choose the right type of insulation and ensure that it’s installed correctly.
Creating a home office or workspace
Set up a dedicated area for work or hobbies with proper lighting, storage, and furniture.
Here are some tips on how to create a comfortable and functional home office or workspace:
Choose the right location: The location of your home office or workspace is crucial. Choose a space that is quiet and free from distractions. A spare bedroom, a corner of your living room, or even a converted closet can work well.
Invest in a good chair: You will be spending a lot of time sitting in your chair, so it’s important to invest in a comfortable, ergonomic chair that provides good support for your back and neck.
Get a desk that fits your needs: The right desk can make a big difference in your productivity. Consider how much space you need for your computer, paperwork, and other items. Make sure the desk is at the right height for your body and that it has enough legroom.
Choose proper lighting: Good lighting is essential for productivity and preventing eye strain. Position your desk near a window to get natural light, or invest in a good desk lamp or overhead light.
Organize your workspace: Keep your workspace clutter-free and organized. This will help you stay focused and productive. Use organizers, file folders, and other storage solutions to keep your workspace tidy.
Make it comfortable: Add some personal touches to make your workspace comfortable and inviting. This could be a plant, a piece of artwork, or even a comfortable rug.
Consider your technology needs: Make sure your workspace has everything you need to work efficiently. This could include a good computer, printer, and other necessary equipment.
Before starting any DIY home improvement project, it’s essential to plan carefully, gather the necessary tools and materials, and ensure you have the appropriate skills to complete the task safely and efficiently.